
Welcome to our NEW AT SU! Blog hop! We are a group of Stampin’ Up! demonstrators from around the world who are Hoppin’ with creative paper crafting ideas to share with you. Today we are showcasing products from the August-December Stampin’ Up! Catalog.
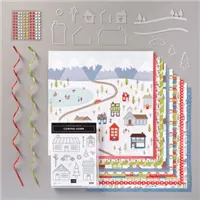
My project today uses one of the fabulous Rectangle Tins. As soon as I saw these in the Catalog, I knew they had so much potential. I could not wait to get my hands on these. I can’t believe that until now, I’ve just used them as tins. Just wait til you see what I have in store for you today. You are going to love it!
To give you a little background, my nieces and nephews are all adults and so are my two kids. I’m always looking for the perfect Christmas gift for an adult “kid”. As my kids tell me “cash is king” and is always the right size. So, yes, I’ve given up on tangible gifts. Actually, I haven’t given up, I’m just going with the flow on this one. If they want cash, then cash it is. Plus, I remember what it’s like to be 20-something and I didn’t really need another candle or scarf, no matter how pretty they were. And without further ado… here is today’s project!

I made these tins to be Christmas ornaments! And… gift boxes. How cool is that! They’ll get a lovely ornament to hang on their tree (and I have fewer gifts to wrap). And tucked inside is a little bit of cash to spend on whatever they want to spend it on.

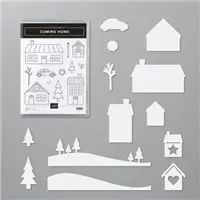
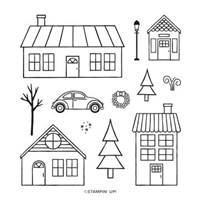
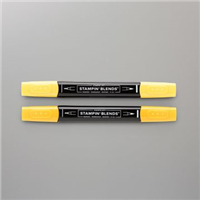
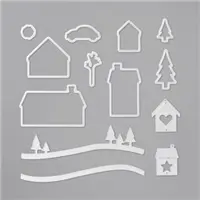
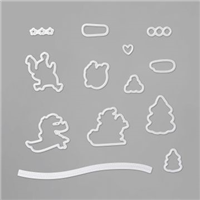
This project comes together pretty easily, it’s just a lot of steps and a lot of coloring. I started by stamping all the various pieces and then colored and die cut them. I had my background pattern paper cut to size on the front of the tin. Then I just played with the location of the hills, trees, and house until I was happy with it. One thing to keep in mind, don’t worry if you have something hanging off the edge. I just trimmed it up along the edge. This actually gives you a little more room to work with even though the tin is narrow.
I hope you enjoyed today’s project. If you have any questions about the project or how to put all this together, just let me know.
As you go through the New at SU Hop, be sure to leave comments on each page in the Hop letting us know what you liked. To get to the next page in the Hop, click the Next button below to see Anke’s amazing work.

If you think you missed anyone along the way, you can click on the link below and it will take you right to their Blog.
- Tricia’s Stamping Creations – Christmas Means More
- Sugar & Scraps – Merry Moose
- Carterie Plus – Snowman Gift Tower
- Moore Fun Stamping – Gift Wrapped
- Creative Juice by Loni – Banner Year
- Stamping Flair – Wishes & Wonder
- Gifted Hands Ink – Snowflake Splendlor
- Playing with Papercrafting – Pine Woods
- Stampin’ Scrapper – Snowman Season
- 247Inkspiration – Coming Home
- Scraphexe – In the Pines
Please contact your Stampin’ Up! demonstrator if you have any questions or to make a product purchase. I would be happy to answer any questions about products or the techniques shown here. If you do not have a demonstrator, you can use the below link to order products from me or join my 247Inkspiration team.


Great choice of bundles to use to decorate the tin lid! I like this idea for giving cash or gift cards. Can I ask, is there a hole in the top for the ribbon, or did you have to punch one through?
Great question! I used my crop-o-dile to punch a hole in the top of the tin cover. Then I fed the ribbon through the hole and knotted it on the inside of the box.
Cute way to give a money or card gift. I too want to know if there is a hole for the ribbon or did you punch one and if so with what?