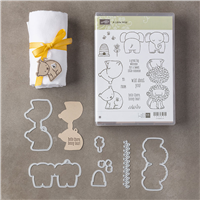
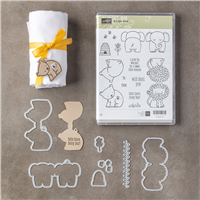
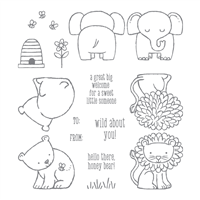
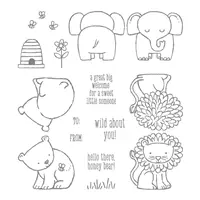
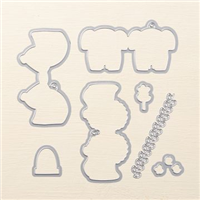
One of the cutest little stamp sets in the new Annual Catalog is called A Little Wild. This trio of little animals includes both their fronts and their backs. The stamp set has a coordinating die set so no need to get out those scissors. If you’ve seen the set in the catalog, you might have noticed the animal fronts and backs are on the same stamp together. When you use the dies with these little guys, you are actually making a little gift tag that you can attach to a gift. Here is what it looks like stamped and die cut. These little gift tags are so easy to make. Just stamp, die cut, and fold in half. But you don’t have to use them only to make gift tags. You can use just the front side, or just the back side, or both together like in today’s card. Using both the front and back of the little bear, I made a spinner card. A spinner card is when you have a focal point in the card that can actually spin around.
  I did learn a couple things making this card…
- To get the correct placement of the circle on both the card base and the pattern paper, I had to die cut both pieces at the same time. When using the wafer thin dies it is not recommended that you do this. You really want to cut only one layer at a time. I made an exception for this one card.
- I found that I need to tack down my pattern paper before die cutting or the paper shifted while die cutting. Do not permanently adhere your paper yet.
- The layering circles die set includes both regular circles and scalloped circles. To get the Whisper White scallop frame, I used a scalloped edge that nestled the circle I’d used for the front of the card and ran both through the machine at the same time.
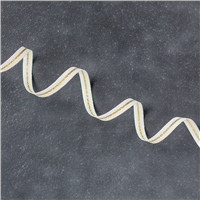
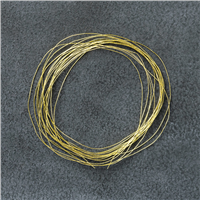
Here’s a close up of the circle cutout. You can see that my little bear is suspended on the metallic thread. The thread is glued down on the inside of the bear. This is really easy to do. Lay your bear face down on a work surface. Lay the thread across the back of the face down bear. Using fine-tip glue, glue the thread to the back of the front of the bear. Place the back side of the bear on top, while lining him up with the front side. They should match exactly and your thread should be between the front side and the back side.
When assembling this card…
- Start with die cutting the circle in the front.
- Gently peel the pattern paper back up. Remember, you were supposed to only tack it down so it didn’t shift. Not permanently attach.
- Place your assembled bear across the hole in the front of the card.
- When happy with the placement, tape down the Metallic threads at both the top of the circle and the bottom of the circle. If your threads are too long, trim the excess.
- Now you’ll want to adhere your pattern paper to the card base. Make sure you start by lining up the the paper over the circle. They should match exactly since you cut them both out at the same time.
- Glue down the scallop frame around the hole.
- On the inside of the card, be sure to add a complimentary neutral paper. Since my bear is the same color as the card base, I used Powder Pink to match the pattern paper on the front of the card.
And this is what the inside of your card looks like! Such a cute little bear bum. You could choose to cover the inside of the card with pattern paper too. I wouldn’t recommend cutting out three layers at the same time though. The third layer, you’d want to measure the circle placement carefully and then die cut it separately. I wish I could say that you could easily make this card in five minutes or less because I love Five Minute Friday ideas. However, with all the die cutting and working to line things up properly, it just isn’t going to happen in five minutes or less. The final card sure is cute though. This would make a great card for a baby shower, or a little girl, or anyone that’s a fan of bears or pink.
For the month of July, Stampin Up is offering two incredible specials: Bonus Days and Christmas In July. Don’t worry, you can take advantage of both of these awesome deals!

Has your wish list grown since the new catalog came out? Then treat yourself to Bonus Days: for every $50 you spend July 1–31 (before shipping and tax), you’ll get a $5 Bonus Days coupon that you can use August 1–31. There is no limit to how many coupons you can earn. Spend $100, get two coupons. Spend $150, get three coupons and Host Benefits too!
 Ho, ho, ho! Our Christmas in July promotion makes it easier than ever to sign up to be a demonstrator! Just purchase your Starter Kit by July 31 and you will receive a FREE Essentials Gift Pack including Paper Snips, SNAIL Adhesive, Grid Paper, two D Blocks, and a Bone Folder. That’s an added value of $52! And since as a new demonstrator you can get your hands on new products before anyone else, we will include the Carols of Christmas Stamp Set from the holiday catalog for FREE ($20 Value)! The Starter Kit costs $99 (including shipping), and with this promo, you will get a total of $197 in products for only $99. This deal is too good to pass up. Sign up now and join my team.


Leave a Reply