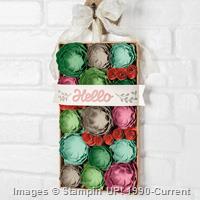
Carrying on with Monday’s theme of Succulents, today I’m sharing the Vertical Garden Project Kit. This kit contains everything except glue to make this beautiful wall hanging. The succulent plants and roses are all pre-cut. You just need to punch them out of the paper, shape them, and then glue the down.

Here are a couple tips when making this project.
- Look at the instruction sheet. I usually skip looking at the instructions and try to wing it. With this kit, you’ll need to read the instructions to determine which layers go together.
- The instructions give each layer of the plant a numerical code by size. The instructions tell you which sizes go together. You will need two of each size for each plant that you make. As you punch out your leaves, lay them in piles according to each plant.
- I used the tip of my embossing stylus to shape the plants. You could also use a bone folder. This took quite a bit of time to shape each individual layer.
- Once I had my stacks of plants shaped, I started gluing them together using my Fine-Tip Glue. Be sure to offset each layer so you see all the different petals. You’ll want to give them time to dry before working with them.
- The roses I wound around a pencil to shape them. Then I slid them off the pencil and filled the base of the rose with hot glue to get them to hold their shape.
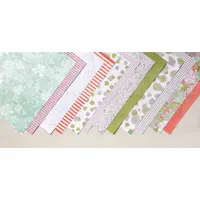
- I laid everything out in the tray to check for sizing before gluing down. I did notice that I could see a bit of the tray they sit in. Rather than leaving it plain brown, I added some of the pattern paper from the Succulent Garden Designer Series Paper. You can skip adding the paper if you prefer the plain brown background.
- I transferred all the plants to my desktop and lined them up as they were in the box.
- Using a hot glue gun, I glued each plant down, working from the bottom to the top. Since I knew my plants would just fill the space, I was careful to not place them too close together. In fact, I ended up with a small gap, but made sure that it would be under the “Hello” sign.
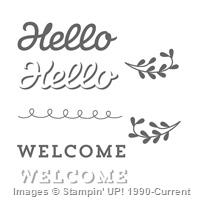
- Stamp the Hello banner and center over the top of the tray. I used a hot glue gun to glue it down.
- The ribbon is the final piece. You should be able to fairly easily slip the ribbon through the slit in the tray. Then tie it in a bow.
Here is a close-up view of the tray with the plants. I love how this project turned out. It did take a bit of time to assemble it. You’ll want to allow several hours to make it. Initially, I was going to ink each layer of the plants. I decided to pass on that idea, knowing it would likely take more than another hour to do all the inking. It would have looked nice inked, but I wanted to finish the project. 
Don’t forget that Sale-abration has started. For every $50 order (pre-tax/shipping), you can pick a free Sale-abration item. Don’t miss out! Click the links on the right and they will take you directly to my store to see the Occasions Catalog and the Sale-abration Catalog.


You did a fantastic job putting this project together! Thank you for sharing!!
Thanks Patty!