I received several questions about my Spooky frame from Wednesday so I thought I would share more details about it.
The inside of the frame is 4 3/8ths” square. I have used these frames before and found they can vary slightly in size. I usually measure each side and cut my paper to fit. You will want to build this before you out it in the frame.
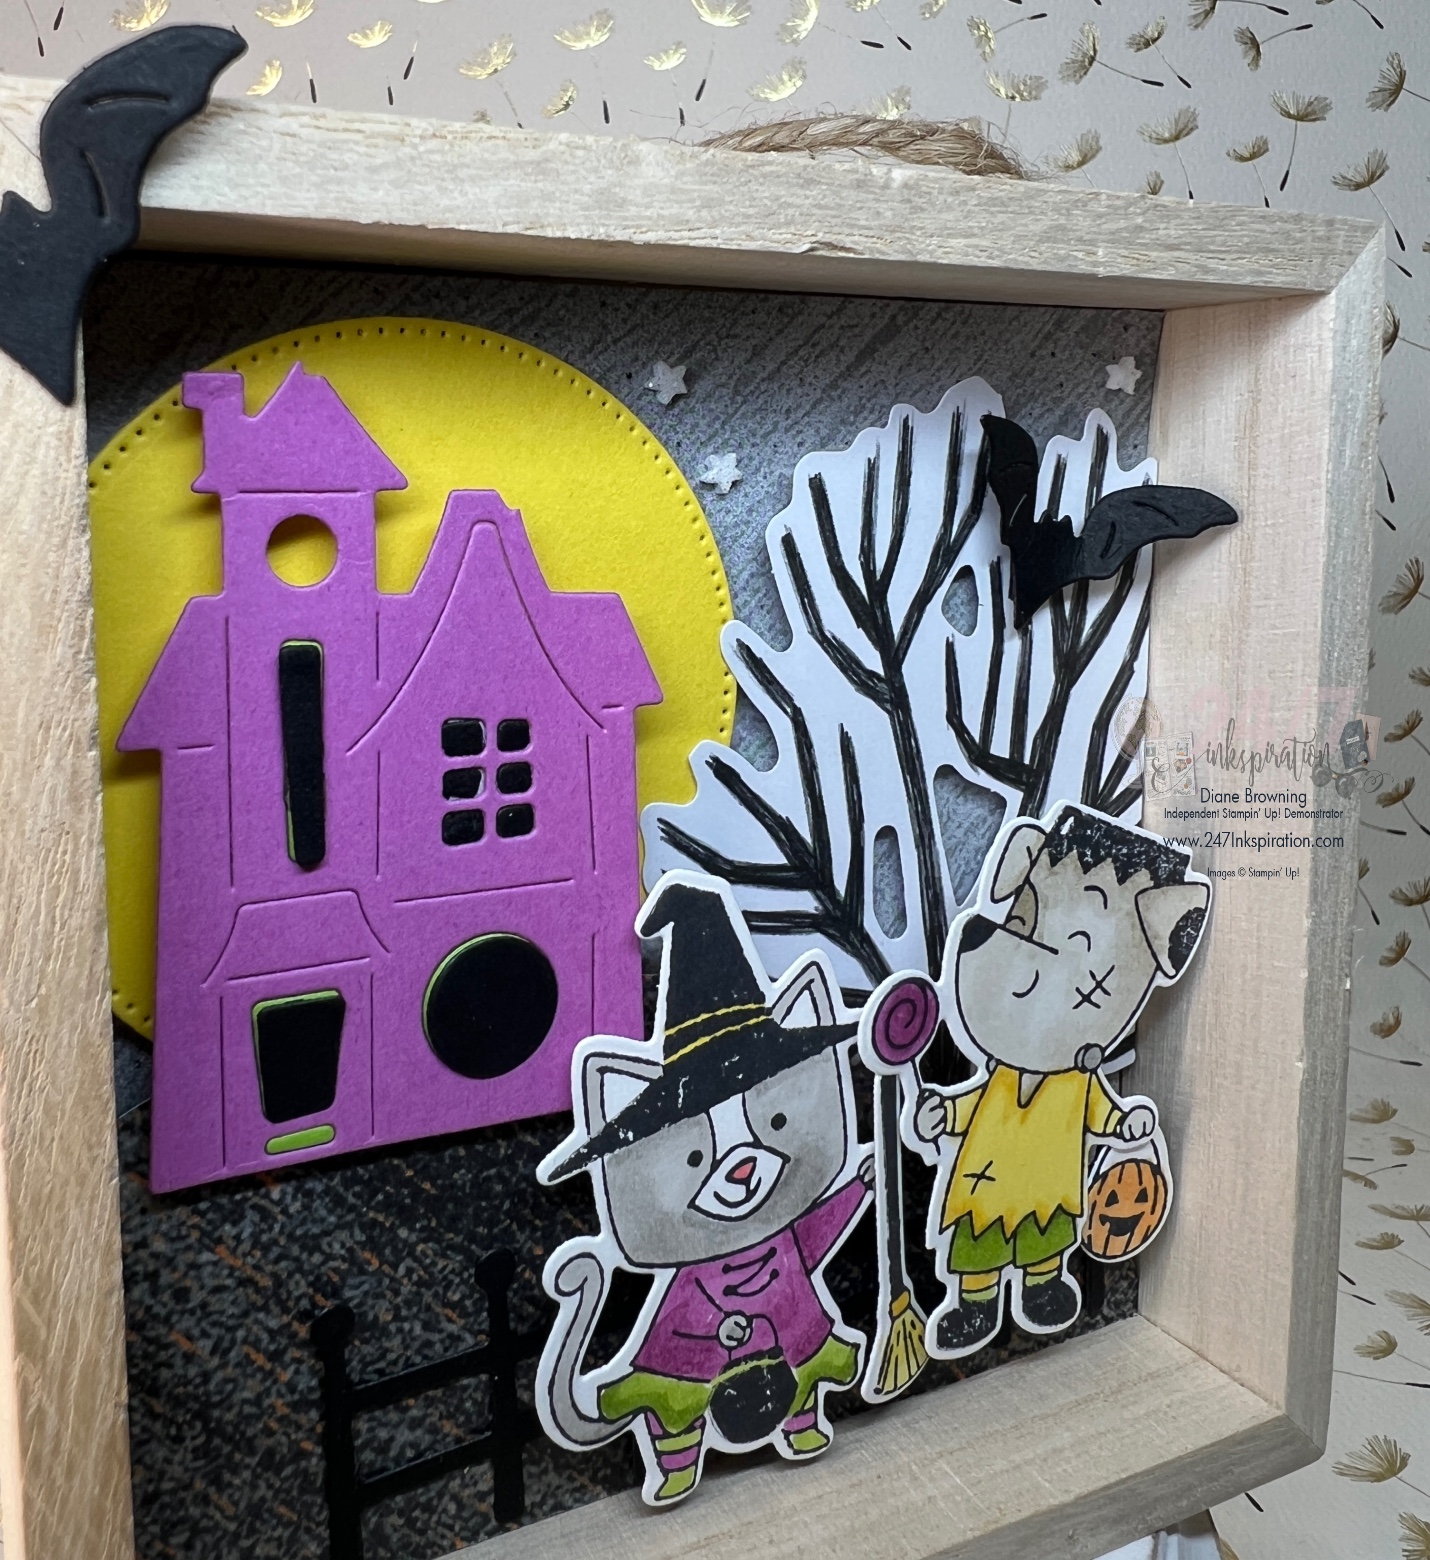
Here’s how you do the layers.
- Pick a paper for your background square.
- I cut the dark gray piece on the bottom left to resemble a hill. Add it to the square with dimensionals.
- Using dimensionals, I added a giant yellow moon on the upper left corner. It will hang off the edge of your background square.
- Then add the house on top of the dark hill in front of the giant moon. I die cut the house out of a couple colors to get the black windows and door, then a small green strip for the step in front of the door.
- On the right side, add the giant tree from the pattern paper pack using dimensionals. The tree will hang off the background square on the right side.
- Add the fence across the bottom.
- Stamp a color the cat and dog. Then add to square with dimensionals.
- Add a bat to the tree and the frame itself.
- Add the adhesive foam stars in the sky above the tree and moon.
- Turn the whole project upside down and cut off any element that extends beyond the base square.
- Adhere the square inside the frame.
Everything in the square is layered with dimensionals. The creates a fun 3-D look for all the elements. You could make this using a larger frame and space out the elements further apart or even add in more elements.


Leave a Reply