A few years ago I joined the planner craze. If you have no idea what I’m talking about google “planners” or “planner girl” and you will be amazed by what people do with planners. They’ve gone from boring lists of appointments to a fully decorated memory-keeping book. For some people, it’s even replaced their traditional method of scrapbooking. They write in their lunch date with friends, snap a pic at lunch, and then glue their picture into their planner. And Viola! It is memory-keeping simplified.
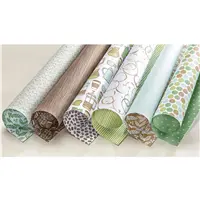
So much of what we do as stampers and crafters translates so easily to decorating your planner. We buy rolls of washi tape for cards and projects. Planner girls buy rolls of washi tape to decorate their planner. I use different colors of washi in my planner to designate trips or other activities. Everyone in my family has their own color of washi in my planner so I can tell at a glance who has something going on.
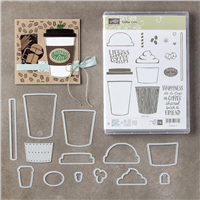
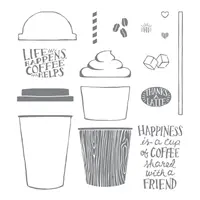
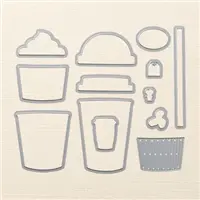
One intriguing thing I’ve noticed about the world of planners is decorated clips. They are supposed to be a little on the big size, represent something you love, and they are should peek out the top of your planner. Yes, really. And it’s perfectly acceptable to have as many clips as you have room to display at the top of your planner. Since I still had out my leftover coffee cups and lids that I die cut last week, I made a few of my own clips. Here is what they look like peeking out the top of my planner. Here’s a close up view of the clips. So cute!
These are actually a little taller than what I would normally use in my planner. I prefer things that are a little shorter so they aren’t going to get caught on something and pulled out. Don’t worry though if you end up with a clip that’s just a little too big. You can also use these clips on the pockets inside your planner. 
You’re probably wondering how I made these clips. They really are very easy. Here’s how you assemble them.
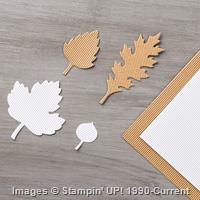
- You’ll need a die cut or punch or something cut out. I recommend cutting two of each so you’ll end up with a clip that is reversible.
- Assemble the front side of your clip if there are multiple pieces like these coffee cups.
- Lay it face down on a flat surface.
- Using your fine-tip glue, adhere the paper clip to the back side of your die cut.
- Let the glue set up for a little while. This will hold the clip in place while you add on the back side.
- Once the glue has a chance to mostly solidify, add on the back pieces one at a time. With this cup, I added the heart at the top first. Then I glued down the cup. Then I added the lid on the back, ensuring everything was lined up with the front side.
- Be sure to be generous with the fine-tip glue around the paperclip so it will stay in place.
- Set the clip aside and let dry. I let mine dry over night.
 This is the back side of the clip. You can see that the heart is lined up with the heart on the front. And the cups and lids are lined up as well.
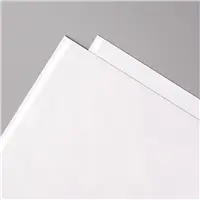
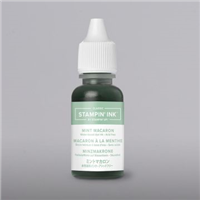
My second clip is a mint mocha frappucino, which happens to be my favorite frapp. To make a mint mocha frapp, you will need Glossy White card stock. This allows you to blend and color the ink better than if you used our standard Whisper White card stock.

I used a cotton swab to add in little dabs of early espresso to make it look like chocolate chips. To get the speckled look, use a paint brush to flick ink early espresso reinker. Let me warn you, this is messy. I had early espresso under my finger nails for days. If you pay for manicures, you probably want to use a glove when you do this. I die cut a cup and a lid out of our Window sheets to give it the right look. The downside with the Window sheet is that you can see the glue. If this will annoy you, then skip the Window sheets.
My mint mocha frapp is reversible as well. If you are making a frapp with whip cream, just remember that you want the points of the whip facing the same direction when you glue the front and back to each other.
These planner clips are fairly easy to make. If you need to make them in a hurry, you can use a hot glue gun instead of the fine-tip glue. The hot glue will set up much quicker and your clips will be ready to go in just a few minutes.
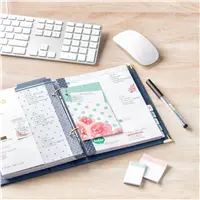
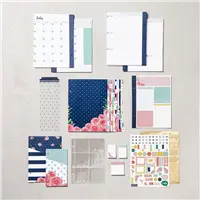
If you’re wondering where I got that amazing navy and gold planner, it is Stampin Up’s planner that was just released in the new Annual Catalog. The Love Today Planner Kit is $37 US and comes with the cover, the inside pages, pocket pages, bookmark, photo pages, stickers, post-its, dividers, and more. As someone who has purchased other name brand planners, I can assure you this is an incredible deal for a fully loaded planner with all the fixins’. This planner is undated so you can literally start it at any time. And there is a refill kit available as well.
I hope you enjoyed seeing another use for your card and craft supplies. Making these clips becomes quite addicting. I’d love to see what you come up with. You can tag me on Instagram (@247inkspiration) with your creations.


Leave a Reply