Today has been one of those days where I start a task, then have to stop to do something else. Then back to the original task and once again interrupted. And the cycle keeps repeating. All. Day. Long. I love the summer break from school with no homework or tests, but it sure wreaks havoc on our scheduling. We are usually fairly regimented during the school year, but when summer comes along everything flies out the window along with the set dinner and bed times. It literally took all day Sunday to get this card made and it seemed like such a simple idea when I started.
Rainbows keep popping up in both my Instagram and Pinterest feeds lately so I’ve had rainbows on the brain. I love a bright rainbow of colors. Today’s card was made using the Emboss Resist technique. This is a good technique to use when you want to have a big impact without a lot of extra dimension. Fortunately, this is a card that can be made when you get interrupted 500 times (not exaggerating). Ok, maybe a little exaggeration.

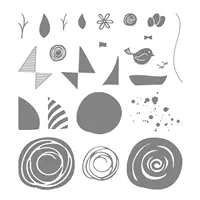
Both the background and the panel on top use the Emboss Resist technique. Here is a step-by-step how to for Emboss Resist:
- Stamp the two swirly stamps in Versamark ink.
- Pour clear embossing powder over all of the stamped swirls. When it comes to embossing, you need to pour your powder over the wet ink right away. However, you don’t have to heat emboss it right away. I have even waited several days to heat them and it still works just fine. The only down side to waiting is curious little fingers wanting to touch it and they brush away the powder.
- Using a heat tool, melt the embossing powder. Do not use a hair dryer for this. A hairdryer will blow the embossing powder off the front of the card. A heat tool heats the powder melting it to the front of the card without blowing it everywhere.
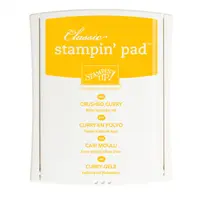
- Add color to the front of the card using sponges. Make sure to blend where the different colors meet to get a more even transition. I did the same process with the top panel as well, using only the small swirly stamp and just two colors of ink: Melon Mambo and Crushed Curry. Blending the two together gives that nice orange color in between the two.
- Use a tissue to wipe away the excess ink off the embossed portion.
- For the top panel, you’ll want to stamp the sentiment in Archival Black ink before stamping the swirls and adding the clear embossing powder.
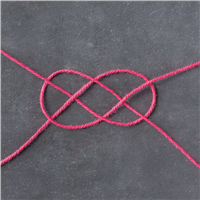
The assembly on the card is really simple. The Bakers Twine is wrapped around the front, then the panel is placed across the top using Dimensionals. And everything is adhered to a Basic Black card base.
Here’s hoping you can finish whatever projects you’ve been working on lately, even if it takes all day.


Leave a Reply